
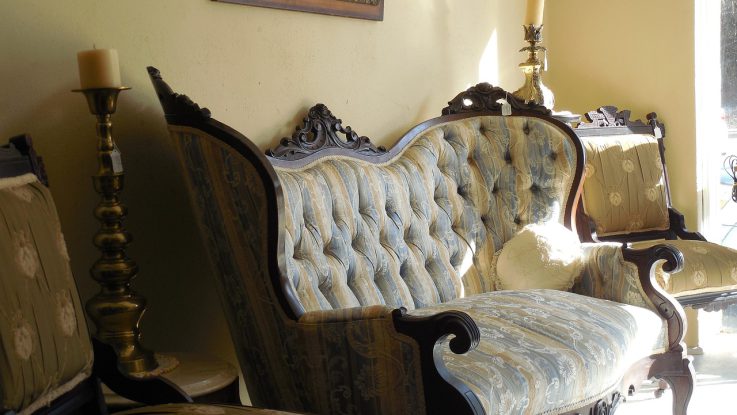
Antique furniture holds a lot of history, style, and charm. These timeless pieces often keep fascinating stories within their walls. However, alongside these stories comes an unwelcome guest – the musty smell that can permeate the piece.
Fear not! There are simple and effective ways to banish this odor, most of which can be found in your kitchen cupboard. In this article, we’ll explore how to use vinegar, baking soda, coffee grounds, and other odor-absorbing substances to freshen up your antique wood furniture.
We’ll also explain the benefits and methods of using fresh air and sunlight to eliminate musty odors and breathe new life into your cherished pieces. In the end, we’ll discuss stripping and sanding antique wooden furniture and removing the old lining and glue to eliminate musty odors and restore their original beauty.
Let’s dive in!
Using Odor-Absorbing Substances
Odor-absorbing substances are able to effectively eliminate musty smells and leave your antique wood furniture smelling fresh and clean. Let’s review the most famous ones.
Vinegar
Vinegar, particularly white vinegar, has long been recognized for its cleaning and odor-neutralizing properties. Its high acidity helps break down odor-causing compounds, making it an effective and safe solution for deodorizing antique furniture.
Here’s how to use vinegar to tackle those stubborn smells.
Surface Cleaning with a Vinegar Solution
Mix equal parts of white vinegar and water in a spray bottle. Lightly mist the solution onto the furniture’s surface, careful not to over-saturate it. Gently wipe the surface with a soft, clean cloth to remove dirt or grime. Allow the furniture to air-dry, preferably in a well-ventilated area or outdoors (weather permitting).
Absorbing Odors from Enclosed Spaces
Fill a small bowl with undiluted white vinegar. Place the bowl inside the antique furniture drawers, cabinets, or other enclosed spaces. Leave the vinegar to sit for at least 24 hours or longer if the smell is too intense. Replace the vinegar with a fresh batch if the odor persists, and continue the process until the smell is eliminated.
Vinegar-Infused Sachets for Long-Term Odor Control
Soak cotton balls or small fabric pouches in undiluted white vinegar. Squeeze out any excess vinegar, ensuring that the sachets are damp but not dripping wet. Place the vinegar-infused sachets in drawers, cabinets, or other enclosed spaces within the antique furniture. Replace the sachets every few weeks or whenever you notice the odor returning.
Tips for Using Vinegar on Antique Furniture
While vinegar is a versatile and effective deodorizer, it’s essential to keep the following tips in mind to protect the integrity and beauty of your antique furniture.
Always test the vinegar solution on an inconspicuous furniture area first to ensure it doesn’t damage the finish or cause discoloration. Avoid using vinegar on delicate surfaces, such as silk upholstery or gilded wood, as it may cause damage.
Consult a professional conservator if you’re unsure about the best cleaning methods for these materials. Keep the room well-ventilated during the cleaning and deodorizing process to minimize the vinegar smell and expedite drying.
Baking Soda
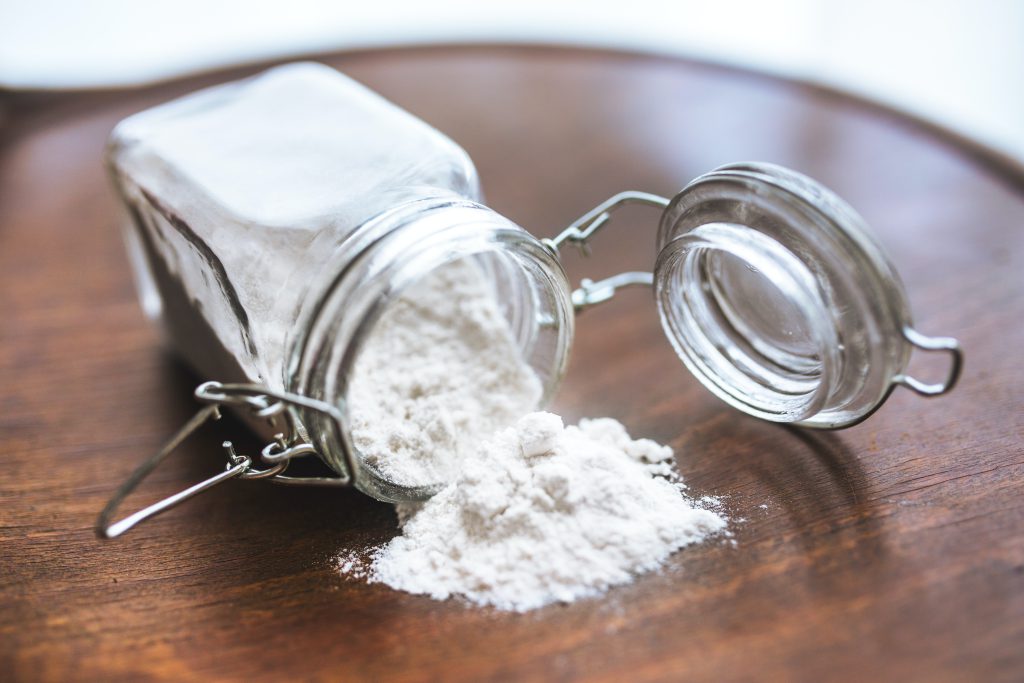
Baking soda, also known as sodium bicarbonate, is a popular and effective odor neutralizer. Because of its alkaline nature, it helps neutralize acidic odor molecules, making it an ideal solution for removing musty smells from antique wood furniture.
Here are some ways to use baking soda to combat odors in antique wood furniture.
Surface Treatment with Baking Soda
Lightly sprinkle baking soda over the entire surface of the furniture, including any cracks and crevices where odor molecules may be trapped. Let the baking soda sit on the furniture for several hours or overnight, allowing it to absorb them. Use a soft brush or vacuum cleaner to gently remove the baking soda from the furniture’s surface. If necessary, repeat the process until the musty smell is gone.
Baking Soda Sachets for Enclosed Spaces
Fill small fabric pouches or sachets with baking soda. Place the sachets inside the antique furniture’s drawers, cabinets, or other enclosed spaces. Leave the sachets in place for at least a few days to absorb odors effectively. Replace the baking soda every few weeks or as needed to maintain a fresh smell.
Upholstery Deodorizing with Baking Soda
If your antique furniture has upholstered parts, baking soda can help eliminate odors from the fabric as well.
Sprinkle a generous amount of baking soda onto the upholstered areas. Allow the baking soda to sit for several hours or overnight to absorb the odors. Use a vacuum cleaner with a brush attachment to gently remove the baking soda from the upholstery. Keep repeating the process until the odor is eliminated.
Tips for Using Baking Soda on Antique Furniture
Despite baking soda’s effectiveness as an odor absorber, it’s essential to follow these tips to ensure that your antique furniture remains in pristine condition.
Similarly to vinegar, ensure the baking soda’s safety on the furniture by testing it on an inconspicuous area first.
Be gentle when brushing or vacuuming the baking soda off the furniture to avoid scratching or damaging delicate surfaces.
For particularly strong or stubborn smells, consider combining baking soda with other odor-absorbing substances, such as activated charcoal or coffee grounds, to fight odors more effectively.
Coffee Grounds
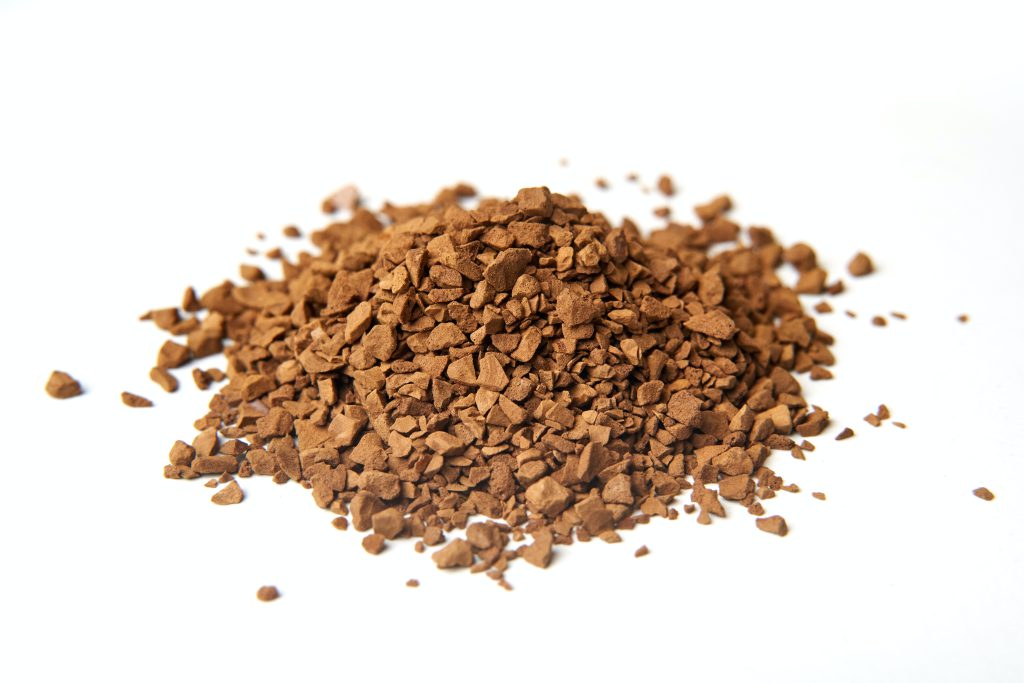
Coffee grounds are a natural and eco-friendly solution for combating unpleasant smells. The porous structure of coffee grounds allows them to absorb odors and their molecules effectively, neutralizing the musty smell of antique furniture.
Furthermore, coffee grounds impart a subtle, inviting coffee aroma that many find pleasing. If you love the smell of coffee, here are some easy ways to use coffee grounds to deodorize your antique furniture.
Coffee Grounds in Enclosed Spaces
Collect used coffee grounds and allow them to dry completely. Fill small, open containers or sachets with dry coffee grounds. Place the containers or sachets in drawers, cabinets, or other enclosed spaces within the furniture. Leave the coffee grounds to work their magic for a few days, replacing them as needed until the musty smell is gone.
Surface Deodorizing with Coffee Grounds
Spread a thin layer of dry coffee grounds onto a large tray or baking sheet. Place the tray or sheet on top of or beneath the antique furniture piece, ensuring it’s leveled and stable.
Allow the coffee grounds to sit for several days as they work to absorb the odors from the furniture. The larger the surface area of the coffee grounds, the more effective this method will be. Once the musty smell has been neutralized, remove the tray or sheet and discard the used coffee grounds.
Refresh Upholstery with Coffee Grounds
If your antique furniture has upholstered sections that need deodorizing, coffee grounds can also be a useful solution.
Sprinkle a thin layer of dry coffee grounds onto the upholstered parts of the furniture. Allow the grounds to sit for a few hours, giving them time to absorb the odors. Carefully vacuum the coffee grounds from the upholstery, removing all traces. Repeat the same procedure until the upholstery smells fresh and clean.
Tips for Using Coffee Grounds on Antique Furniture
Always ensure that the coffee grounds are completely dry before using them to avoid staining or damaging your furniture.
Make sure to test a tiny, hidden area of the furniture first, particularly for upholstered pieces, to ensure that the coffee grounds don’t cause discoloration or damage. Keep the room well-ventilated during the deodorizing process to help speed up odor elimination and prevent any residual coffee aroma from becoming overpowering.
Activated Charcoal

Activated charcoal, also known as activated carbon, is a highly porous substance renowned for its incredible odor-absorbing capabilities. It’s commonly used in air purifiers and water filtration systems because it traps and neutralizes impurities, including odor molecules. Therefore, it’s an excellent solution for removing musty smells from antique wood furniture.
Here’s how to use activated charcoal to tackle those unpleasant smells.
Enclosed Spaces Deodorizing
Purchase activated charcoal from a home improvement store, garden center, or online retailer. The product is typically available in powder, granules, or briquettes. Fill small, breathable fabric pouches, containers, or old nylon stockings with activated charcoal.
Place the activated charcoal-filled containers or pouches inside the antique furniture’s drawers, cabinets, or other enclosed spaces. Leave the activated charcoal in place for at least a week or longer if the smell is powerful. Replace the activated charcoal as needed until the musty odor is eliminated.
Surface Deodorizing with Activated Charcoal
Spread a thin layer of activated charcoal granules on a tray or shallow container. Place the tray or container near the antique furniture piece, ensuring it’s stable and won’t tip over. Generally, this method works best in small, enclosed spaces like a closet or a room with closed doors.
Allow the activated charcoal to work for several days. Once the odor has been neutralized, discard the used activated charcoal and enjoy your freshly revived furniture.
Upholstery Odor Removal
If your antique furniture has upholstered parts, activated charcoal can help remove odors from the fabric as well.
Place a tray or shallow container filled with activated charcoal granules beneath the upholstered furniture. If possible, cover the furniture with a large plastic sheet, creating a sealed environment to maximize the odor-absorbing effect of the activated charcoal.
It may take several days for the activated charcoal to remove odors. Discard the used activated charcoal and the plastic sheet.
Tips for Using Activated Charcoal on Antique Furniture
Always use activated charcoal in a dry form to avoid damaging your furniture with excessive moisture. Avoid direct contact between the activated charcoal and the furniture surface, as it may cause staining or discoloration.
For particularly stubborn odors, consider combining activated charcoal with other odor-absorbing methods, such as baking soda, coffee grounds, or white vinegar, to enhance its deodorizing power.
Ensure proper ventilation during and after the deodorizing process to help speed up the process and prevent any lingering activated charcoal dust from becoming an irritant. Regularly check and replace the activated charcoal in enclosed spaces to maintain the freshness of your antique furniture.
When dealing with valuable or delicate antique pieces, consult a professional conservator or expert to determine the most appropriate cleaning and deodorizing methods for your furniture.
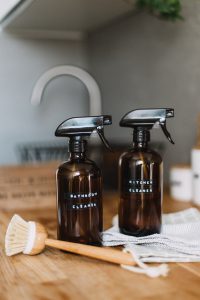
Murphy’s Oil Soap
Murphy’s оil сoap is a mild, biodegradable cleaning solution made from vegetable oil extracts. The product has been a trusted choice for cleaning and polishing wood furniture surfaces for over a century. It not only cleans the wood furniture but also helps to condition it, enhancing its natural beauty. In addition, Murphy’s oil soap can be an effective solution for removing the musty smell from antiques. Let’s see how you can use it.
Cleaning with Murphy’s Oil Soap
Mix a solution of Murphy’s oil soap and warm water, following the manufacturer’s instructions for the appropriate dilution. Dip a soft, clean cloth in the solution and wring it out, ensuring it is damp but not soaking wet.
Gently wipe down the entire surface of the antique wood furniture, paying special attention to any notches, grooves, or areas with visible dirt or grime. Use a clean, damp cloth to rinse the wood furniture, removing any soap residue. Allow the furniture to air dry completely in a well-ventilated area or outdoors.
Deodorizing Enclosed Spaces
Dampen a clean cloth or sponge with the diluted Murphy’s оil сoap solution. Wipe down the interior surfaces of drawers, cabinets, or other enclosed spaces within the antique furniture.
Rinse the surfaces with a clean, damp cloth, ensuring all soap residue is removed. Allow the areas to air dry, preferably with open drawers or doors to promote airflow.
Upholstery Cleaning (For Wood and Fabric Combo Pieces)
If your antique furniture includes upholstered sections, Murphy’s оil сoap can also be used to clean and deodorize the wooden parts.
Carefully clean the wooden frame and surrounding areas using the diluted Murphy’s оil сoap solution, being cautious not to wet the upholstery. Allow the wood to air dry completely before treating the upholstery with an appropriate fabric cleaner or deodorizer.
Tips for Using Murphy’s Oil Soap on Antique Furniture
Always test Murphy’s оil сoap solution on a small and unnoticeable furniture area first to ensure it doesn’t damage the wood’s finish or cause discoloration.
Avoid soaking the wood with too much liquid, as excessive moisture can cause damage or warping. To enhance Murphy’s оil зoap’s deodorizing power, consider combining it with baking soda or coffee grounds to absorb particularly stubborn odors.
When cleaning antique furniture with delicate or fragile surfaces, such as gilding, veneer, or silk upholstery, consult a professional conservator or expert to determine the most appropriate cleaning methods. Regular maintenance is key to keeping your antique furniture in prime condition. Schedule routine cleaning with Murphy’s оil сoap to prevent the buildup of dirt, grime, and odors over time.
Fresh Air and Sunlight

Fresh air and sunlight are nature’s most potent deodorizers, capable of neutralizing various unpleasant odors. Sunlight’s ultraviolet (UV) rays have germicidal properties, which can help kill mold and mildew, while fresh air aids in dissipating trapped odors.
Here’s how to harness the power of fresh air and sunlight to revive your antique furniture.
Outdoor Air and Sunlight Exposure
Choose a sunny, dry day with low humidity to take your antique furniture outside. Place the furniture piece where it will receive direct sunlight for several hours. Be cautious with delicate finishes or fabrics, as excessive sun exposure may cause damage or fading.
Open any drawers, cabinets, or doors to allow air circulation throughout the entire furniture piece. After several hours, rotate it if necessary to expose all sides to sunlight and fresh air. Bring it back indoors before nightfall or if the weather changes, as moisture or dew can damage the piece.
Indoor Air and Sunlight Exposure
If taking your antique furniture outside isn’t possible or practical, you can still take advantage of fresh air and sunlight indoors.
Place the furniture piece near a large window or patio door where it will receive ample sunlight throughout the day. Be mindful of delicate finishes or fabrics, which may fade or be damaged by excessive sun exposure.
Open the windows and doors in the room to allow fresh air to circulate around it. You may also use fans to help improve airflow. Open any drawers, cabinets, or doors to encourage air circulation within the piece.
Allow the furniture to bask in the sunlight and fresh air for several hours or even a full day to maximize the deodorizing effect.
Tips for Using Fresh Air and Sunlight on Antique Furniture
Limit the sun exposure time or use a light shade to protect sensitive surfaces. Monitor the weather closely, ensuring that your furniture is not exposed to rain, dew, or excessive humidity, which can cause further damage or exacerbate musty smells.
After exposing it to fresh air and sunlight, give it a thorough inspection to ensure there are no signs of damage, discoloration, or other issues that may have arisen during the process.
For optimal results, combine fresh air and sunlight exposure with other cleaning methods. You can improve the deodorizing process by adding odor-eliminating elements like baking soda, coffee grounds, or activated charcoal.
Regularly airing out your antique furniture can help prevent the accumulation of musty smells, mold, and mildew, keeping your cherished pieces fresh and well-preserved.
Stripping and Sanding
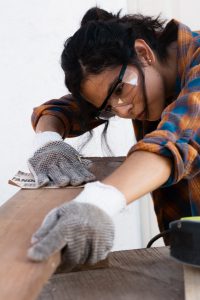
Stripping and sanding antique wooden furniture involves removing the old finish and exposing a fresh layer of wood. This process can be labor-intensive, but it offers the advantage of tackling musty smells at their source while also providing an opportunity to refine and enhance the piece’s appearance.
Here’s a step-by-step guide to stripping and sanding your antique wooden furniture.
Preparation
Choose a well-ventilated workspace, ideally outdoors or in a garage, to protect yourself from fumes and dust. Remove any hardware, such as knobs or hinges, from the furniture piece. Clean the furniture’s surface with a mild soap and water solution and allow it to dry completely.
Stripping the Old Finish
Put on protective gear, including gloves, goggles, and a respirator, to protect yourself from the chemicals and fumes associated with stripping agents. Apply a chemical paint stripper to the furniture surface, following the manufacturer’s instructions. Be sure to use a stripper specifically designed for wood and compatible with the type of finish on your furniture.
Allow the stripper to work for the recommended time, typically 15-30 minutes, or until the finish begins to bubble and lift. Use a scraper or putty knife to gently remove the loosened finish, working with the wood grain. Be careful not to damage the wood surface.
Clean the stripped surface with mineral spirits or a similar solvent to remove any residue, and allow the furniture to dry thoroughly.
Sanding the Furniture
Start with coarse-grit sandpaper (e.g., 80-grit) to remove any remaining finish and smooth out any imperfections in the wood.
Progress to medium-grit sandpaper (e.g., 120-grit) to smooth the surface further and remove any scratches from the coarse-grit sandpaper.
Finish with fine-grit sandpaper (e.g., 220-grit) to create a smooth, even surface ready for refinishing.
To prevent surface damage, make sure to sand with the wood grain. Use an electric sander or sanding block to apply even pressure and avoid creating uneven areas or divots.
Refinishing the Furniture
After stripping and sanding the furniture, apply a wood conditioner to achieve uniform absorption of the stain or finish. Select a stain or a finish that accentuates the wood’s natural beauty and aligns with the intended usage of the furniture piece.
Following the manufacturer’s guidelines, apply the chosen stain or finish with a brush or cloth, working with the wood’s grain. Allow it to dry for the recommended time. If desired, apply a protective topcoat, such as polyurethane, to seal and protect the wood surface. Allow it to dry and cure completely before reassembling any hardware and placing the furniture back in your living space.
Tips for Stripping and Sanding Antique Wooden Furniture
Work in a well-ventilated area and use appropriate protective gear when using chemical strippers and solvents to minimize the risk of health hazards.
Be patient and gentle when sanding, as excessive pressure or haste can damage the wood surface and lead to uneven results.
To clean, deodorize, and refinish antique furniture that is especially valuable or delicate, consult a professional conservator.
Removing Old Lining and Glue
Removing old lining and glue from antique furniture can be a complex and delicate process, requiring patience, care, and the right tools.
Here’s a step-by-step guide to removing the old lining and glue from your antique furniture.
Preparation
To protect yourself from fumes and dust, work in a well-ventilated area, ideally outdoors or in a garage.
Remove any hardware, such as nails or screws, from the furniture piece. Carefully remove any fabric or lining from the furniture, not damaging the underlying wood or foam.
Removing Old Lining
Inspect the foam or batting underneath the fabric lining for any signs of damage or mildew. Remove any damaged or mildewed foam or batting, disposing of it properly. Use a staple remover or pliers to remove any staples or tacks holding the lining in place.
Use a scraper or putty knife to remove any remaining adhesive or residue from the wood surface. Clean the stripped surface with mineral spirits or a similar solvent to remove any remaining residue.
Removing Old Glue
Inspect the wood furniture surface for any signs of damage or mildew. If you have old glue or adhesive on the wood surface, scrape it gently with a scraper or putty knife. Remove any remaining residue with mineral spirits or a similar solvent.
Tips for Removing Old Lining and Glue from Antique Furniture
Be patient and gentle when removing old lining and glue, as excessive force or haste can damage the underlying wood or foam. Always wear protective gloves and goggles when working with solvents or adhesives to minimize the risk of skin irritation or eye damage.
Once the old lining and glue have been removed, clean the stripped surface thoroughly with a mild soap and water solution and allow it to dry entirely before reupholstering the furniture.
Conclusion
In conclusion, musty odors in antique furniture can be eliminated using various methods.
Natural substances like vinegar, baking soda, coffee grounds, and activated charcoal, along with extensive techniques like stripping, sanding, and removing old lining and glue, offer a practical solution for deodorizing antique wood furniture. Additionally, fresh air and sunlight exposure can help eliminate or reduce musty odors.
By using the right approach and consulting with experts when necessary, you can restore your antique furniture’s original beauty and maintain its value as a treasured part of your home for years to come.
Leave a Reply